How to Take the Best Photos While in Hawaii: Top 7 Hawaii Photography Tips
If you're planning a vacation to Hawaii, you'll want to brush up on your Hawaii photography skills! These 7 tips will get you ready to capture those amazing memories, whether you're using a digital camera, traditional film, or even your phone.
Are you planning a vacation to Hawaii? As one of the most beautiful places in the world, the islands offer unlimited opportunities to capture breathtaking images. But if you’re a novice photographer, you may benefit from some ideas on how to maximize your Hawaii photography efforts, such as how to frame your photo, put your subject in the best light, and put the spotlight on the most stunning aspect in your shot. Here, I offer 7 tips to perfectly capture your vacation memories, whether you’re using a digital, film, or phone camera.

The Na Pali Coast on the island of Kauai is just an awesome sight! I had the pleasure of photographing this from a boat and was very blessed to have a rainbow here in the scene as well. One of my personal favorite scenes right here on planet earth
Collector's Edition of 50
1. Consider Your Subject
Everything can be beautiful when captured well. In considering your Hawaii photography subjects, look at everything in your frame: the foreground, background, and everything in between. When going for the perfect shot, I might not even center directly on my intended subject. Instead, I’ll use the rule of thirds, which refers to how you look at your subject through your lens and where you place it in the picture. Pick up your phone to take a picture, and you’ll see a 3x3 grid. Most digital cameras offer this option as well, but you’ll have to use your imagination with a film camera.
With the rule of thirds, you’ll add a new perspective to the shot. If you’re practicing some landscape Hawaii photography, choose something in the foreground or background to focus on. As you’ll see in this image below, I did that with the boat, placing it in the right third of the frame. It differs the perspective and makes the eye pull to the boat first and then take in everything else in the picture.

An always classic view of the beautiful Kuau Cove by Mama's Fish House
Collector's Edition of 50
2. Take Numerous Shots
The benefit of using a digital camera or phone is that you have nearly limitless shots available to you. Put your subject in the center, left, or right of the frame; fill the entire frame with your subject; or pull back so your subject is farther away. You may even take many pictures from the same perspective with different frame speeds or lighting.
Be sure to save your images to the cloud or your computer at the end of each day, so you’re ready to load up again the next day. You don’t want to run out of space on your disk or phone!

One of the most epic ideas I had for an image and it really just kind of happened so I had to figure out a way to pull this one off. If you look closely, you can also see the international space station in the upper corner of this one too
Collector's Edition of 50
3. Choose the Right Time of Day
Natural light is usually the best choice for Hawaii photography, so you need your lighting to cooperate with you. The best times to take great images are when the sun is not high in the sky but rather to the side, so in the early morning or late evening. Does that mean you can’t capture a great picture in the middle of the day? Of course not, but you should definitely be aware of where the sun is and how it’s affecting your photos.
Use the sun and any other light to your advantage. While it’s often best to have the light behind the photographer and directly on the subject, if you’re taking pictures of people, they could be caught squinting or even with their eyes closed. Just shifting your angle a little bit can make a world of difference in your final product.
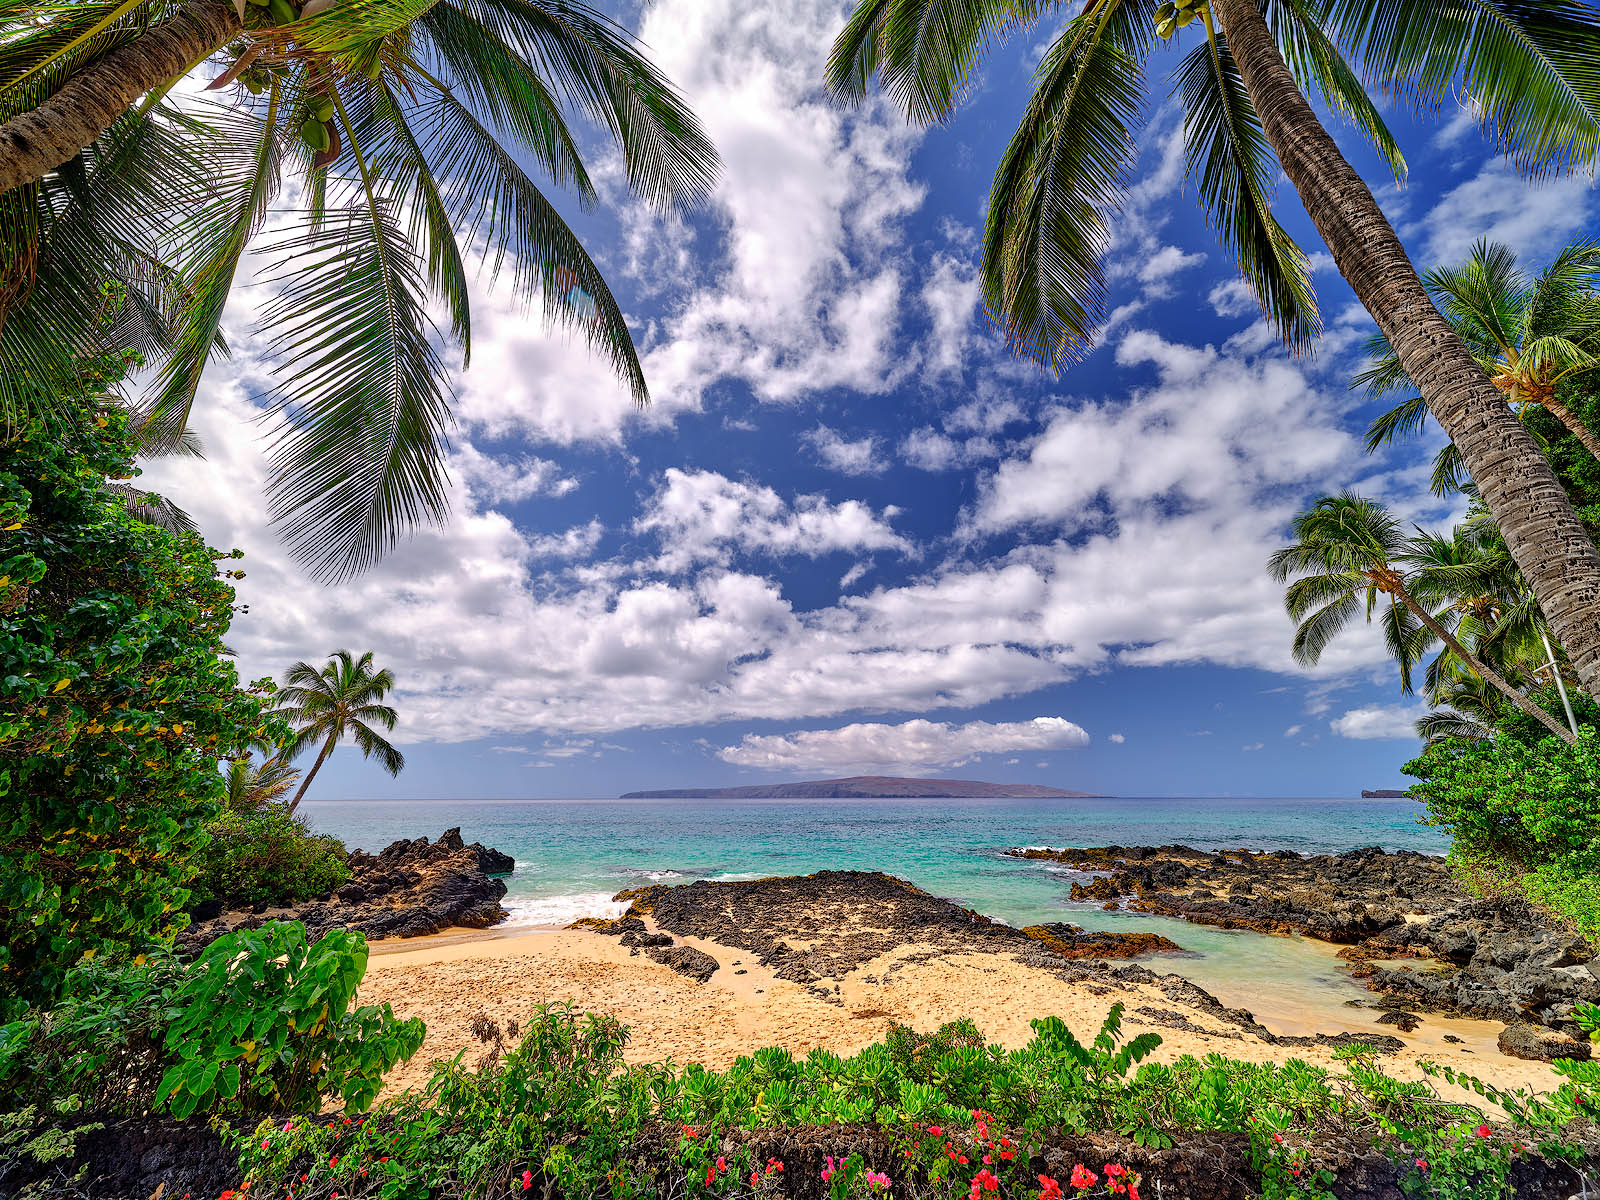
In the picture below, you can see that the sun was behind me and to the left, which added interest to the image with shadows of the trees. This is just one way I use natural light to my advantage in my Hawaii photography.

One of my most favorite places in the world is this little cove here on Maui. This was such a perfect scene with the watercolor, the clouds, and I love the palm shadows created on the beach from the palms behind. Just simply a perfect morning spent in paradise
Collector's Edition of 50
4. Tell a Story Through Imagery
You’ve always heard the adage about a picture conveying 1,000 words, and it is most definitely true with Hawaii photography. You are not only capturing images, you’re capturing memories. Take a look at this image below of surfboard fences on Maui. There’s a story there, in addition to a stunning photograph. While not every photo you take will have the same effect, when that is your goal, you’ll end up with a multitude of amazing images that will truly convey the magic of your Hawaii adventure.

Surfboard fences first became a thing on Maui. Having your fence in the same spectrum as a rainbow is taking it to the next level. Classic north shore Maui scene right here
Collector's Edition of 50
5. Use a Tripod
While there are some times you’ll see a great image and want to capture it then and there—before the light changes—there are other times where you’ll have the leisure to really compose your shot. That’s when a tripod can come in handy. A tripod allows you to take your time, frame the shot, and play with exposures and angles. Plus, if you’re walking through a stream and want to take a picture, it can be challenging to keep yourself upright, let alone while holding a camera and trying to take a great shot. Your tripod immediately makes the whole situation easier. There are also times when you'll want to play with your exposure time and long exposures can add an entire new dimension to a photograph. This brings us to the next tip.......

One of the most peaceful zen type of an image that I've created, a long exposure at Lanikai Beach on the island of Oahu just has a surreal look. The water color and pastel tones here at sunset are just really special
Collector's Edition of 50
6. Vary Your Exposures
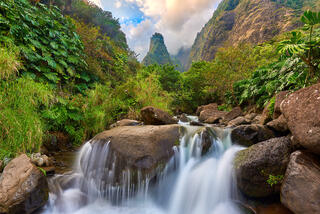
Even today’s phone cameras allow you to change your exposure, so this Hawaii photography trick is now available for even the most novice of photographers. Long exposures are perfect for waterfalls, streams, and even waves, all of which are plentiful in Hawaii photography. This will soften the look of water in the final image, making it look smoother and almost ethereal. You’ll need to use your tripod to achieve this affect since timing is everything and a steady shot is a must.

A beautiful glimpse of Wailua Falls near Hana on the island of Maui. I did a focus stack on this image with a medium format camera for ultimate sharpness and image quality
Collector's Edition of 50
7. Use Editing to Your Advantage
Once you’ve captured your images, you’ll want to do some editing to really make them sing. Even a perfectly composed picture with stellar lighting and the right exposure can be enhanced through editing. Just sharpening colors or making a slight change in brightness makes all the difference.
Having lived in Hawaii for many years, I love the many intricacies of Hawaii photography and enjoy sharing tips with visitors so they can capture their many memories for years to come. If there’s something you miss, though, be sure to check out my gallery. I may well have just the right picture there to hang in your home.

Kalalau Valley on the island of Kauai is one of the most special places on Earth to me. Just absolutely breathtaking and if you could imagine what heaven must look like, well I think it'd look like this
Collector's Edition of 50

One of the most epic moments that I've captured and this image is super special to a lot of collectors. Really blessed to have experienced this magic
Collector's Edition of 50

A very special scene I've wanted to capture for quite some time, the Kualoa mountains are just stunning. As I got to this location it was a little bit too windy to capture the reflection and then right as the sun rose, it was calm for several minutes allowing this beauty to be captured.
Collector's Edition of 100